Setting up Bitwarden
Table of Contents
- Basic Concepts
- Create New Account
- Configure Biometric Authentication
- Configure Biometric Authentication for the Browser Plugin
- Adding a New Username/Password to the Vault
- Use the Password Generator
- Bitwarden Sends and Secure Secrets Sharing
- Troubleshooting
Basic Concepts
Personal Vault: Each user has their own personal vault for the storing of passwords. Xenter IT does not have access to your personal vault. We can reset access to your account while you are part of the company but we cannot access your passwords. This is a security and privacy feature of Bitwarden.
Corporate Vault: There is also a corporate vault for storing credentials that need to be shared amongst a team. Any account you need/want to share with other team members will be placed in the corporate vault under the collection for your department. I.e. A mechanical engineer would add the account to the engineering collection.
Collections: Each internal department at Xenter has a corresponding collection in the corporate vault. Access to these collections is determined by department and role. For example, members of marketing should have access to the marketing collection and should add their shared passwords there.
Sends: Bitwarden allows you to securely share files with anyone via the send feature. You can add text or upload a file (500 MB limit) and Bitwarden will create a link which you can share with anyone. You can then send the link to whoever and they will be able to open and view/download the text/file in their web browser.
Browser Plugins: Bitwarden provides browser plugins for Firefox, Opera, and all Chrome based browsers. The browser plugin can be used to autofill website logins, add/edit username/password combos in the vault, and to also create sends.
Desktop Integrations: Bitwarden provides a desktop app for those who don’t want to use the browser plugins. The app has the same options and features as the browser plugins, but also has additional support for logging in to Bitwarden using biometrics such as your fingerprint or by using facial recognition.
Mobile Integrations: You can install the Bitwarden app on your phone and configure it to autofill websites and your mobile apps.
Android: Install the bitwarden app and then go to
Settings > General Management > Passwords and autofill. Under autofill service, select Bitwarden.iPhone: Install he bitwarden app and then go to
Settings > Passwords > Password Options. EnableAutofill Passwords and Passkeysand then select Bitwarden underUse Passwords and Passskeys from.
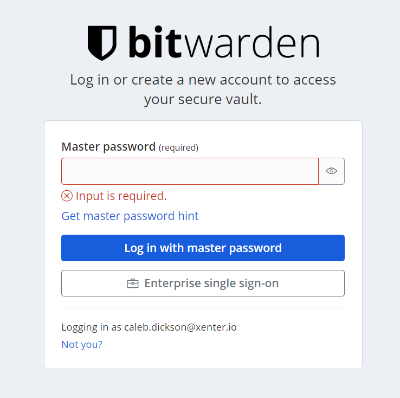
Create New Account
You will receive an invite to set up your bitwarden account in your work email. Click
Join Organization Nowto proceed.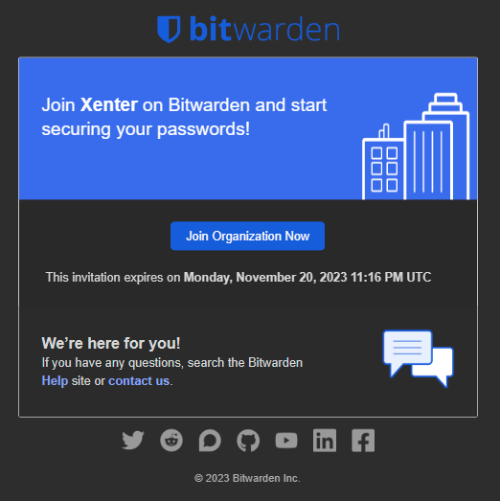
Invitation Once you click on the link, you should be presented with the option to create sign in or create a new account. Choose the option to
Create account.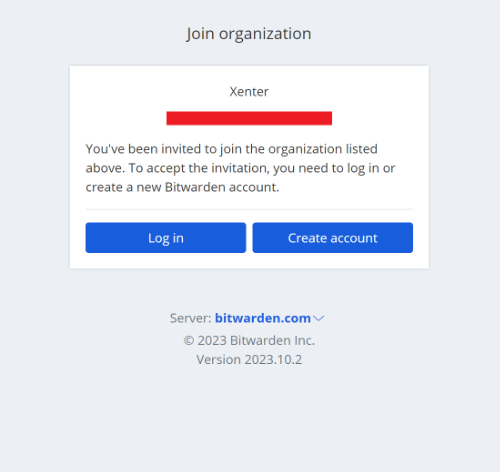
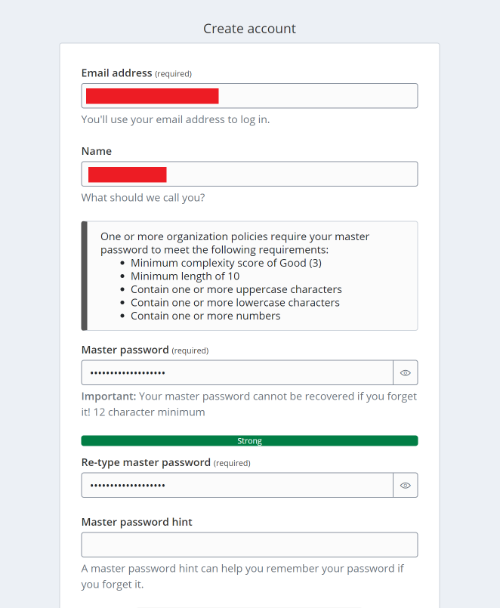
join_organization On the create account page, fill in the fields appropriately. You must choose a master password that is longer than 10 characters and has at least 1 uppercase, 1 lowercase, and 1 number. I recommend choosing a long but easy for you to remember password. Generally speaking, the longer the password the more secure. You will only need to remember this one password which is used to unlock the vault and access the rest of your passwords.
create_account Once the account has been created, an admin must approve you. Contact the IT team and request someone to approve your new account.
Configure Biometric Authentication
Install the Bitwarden desktop client.
Login to the Bitwarden desktop client.
Go to File > Settings. Enable the following options and then click close:
- Vault Timeout: Custom = 8 hours
- Vault Timeout Action: Lock
- Check the box to enable
Unlock with Windows Hello. - Check the box to enable
Ask for Windows Hello on app start. - Check the box to enable
Show tray icon. - Check the box to enable
Minimize to tray icon. - Check the box to enable
Close to tray icon. - Check the box to enable
Start to tray icon. - Check the box to enable
Start automatically on login. - Check the box to enable
Allow browser integration. - Do not check
Require verification for browser integration.
Reboot your computer and open the Bitwarden desktop app.
Configure Biometric Authentication for the Browser Plugin
Follow the steps in Configure Biometric Authentication. Make sure that you can successfully open the Bitwarden desktop app using your biometrics before proceeding to the next steps.
Install the Bitwarden browser plugin.
Open your browser and go to your list of extensions.
- If using a chrome based browser: Find Bitwarden and open its extension settings and enable
Allow access to file URLs. - If using Firefox: Find Bitwarden and open its extension settings and enable the permission to
Exchange messages with programs other than Firefox.
- If using a chrome based browser: Find Bitwarden and open its extension settings and enable
Now open the Bitwarden plugin and login to it.
Go to settings and check the boxes to
Unlock with Biometrics. A Windows Hello prompt should be displayed asking for your fingerprint or facial recognition.Also check the box for
Ask for biometrics on launch. Another Windows Hello prompt will be displayed asking for your fingerprint or facial recognition.Restart the web browser and then open Bitwarden. It should have an option to sign in using Windows Hello now.
Now you should be prompted to scan your fingerprint each time you open your browser and this will unlock the password vault!
Adding a New Username/Password to the Vault
First, decide if the account is a personal or corporate account. It is a corporate account if its shared amongst your team or is a password that must stay with the company if you were to ever leave for some reason.
In the Bitwarden browser plugin or desktop app, click the + icon to add a new item to the vault.
Select
Loginfor the type.Give it a descriptive and logical name that makes it easy to search for.
Add the username and password to the corresponding fields.
If the account has 2 factor authentication setup (2FA), then you can copy the secret key into the
Authenticator key (TOTP)field.Add the login page URL to
URI 1.Under ownership, select your work email if its a personal password. If its a corporate owned password, then select
Xenter. If you selectXenteras the owner, then you must also assign it to a collection too.Click save.
Use the Password Generator
Bitwarden includes a password generator so that you can create very secure passwords quickly. Since these passwords are stored in the vault, they can long and random since you no longer have to remember them. It’s recommended to use 20 characters at a minimum when creating your passwords.
Password Generator in the Bitwarden App
Open the Bitwarden App.
Click on the + icon to add a new login. Next to Password, click on the 🗘 icon.
You can also choose between a password and a passphrase. The difference being that a passphrase is a series of random words.
Expand options and choose the password length. (Or the number of words if you chose passphrase instead of password.)
You can copy and past the password or you can save it by clicking on the checkmark button.
Password Generator in the Bitwarden Browser Plugin
Open the Bitwarden browser plugin.
Click on Generator in the bottom navigation bar.
Choose if you want a password or passphrase.
Choose the password length. (Or the number of words if you chose passphrase instead of password.)
You can copy and paste the generated password as needed.
Bitwarden Sends and Secure Secrets Sharing
Bitwarden has a feature called sends that allows you to securely share files or text messages (max of 1,000 characters) via a link.
Bitwarden Sends Via the App
Open the Bitwarden App.
Click on Send in the bottom left corner.
Click the + icon to create a send.
Choose a name for the send. Note that anyone with the link will be able to see the name.
Upload your file or add the text message.
Expand options and configure to your needs.
When you are done, click on the 💾 icon to save.
In the list of sends, click on the send you created and then click on ⧉ to copy the share link.
You can now share the link via email, SMS, or some other way. Anyone with the link will be able to access the file/text.
Bitwarden Sends Via the Browser Plugin
Open the browser plugin.
Click on Send in the bottom navigation bar.
Click the + icon to create a send.
Choose a name for the send. Note that anyone with the link will be able to see the name.
Upload your file or add the text message.
Expand options and configure to your needs.
When you are done, click on the 💾 icon to save.
In the list of sends, click on the send you created and then click on ⧉ to copy the share link.
You can now share the link via email, SMS, or some other way. Anyone with the link will be able to access the file/text.
Troubleshooting
Issue: You try to login using single sign on (SSO) and see the below error message:
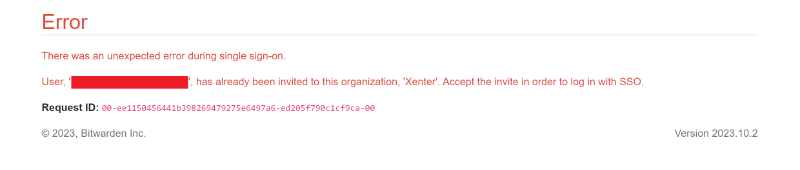
error_sso Solution: An administrator must confirm your account in Bitwarden before you can login using SSO.
Issue: You try to setup a new account using the email invitation but it asks you to login with your master password or SSO.
error_expired_invite Solution: The email invitation link has expired and an admin will need to resend your invitation.