Installation
Prerequisites
- When using ESXi and vSphere, you may need to configure the monitoring interface in the vSwitch to VLAN ID 4095 to allow all traffic through. You can read more about this here.
- If you’re trying to monitor multiple network interfaces, then you may need to enable the
Allow MAC Changesoption at both the vSwitch and Port Group levels. You can read more about this here.
Hardware Requirements
Security onion only supports Intel and AMD with x86-64 architectures. These requirements may increase drastically as you enable more services, monitor more traffic, and consume more logs. Minimum Specs
| Resource | Amount |
|---|---|
| CPU Cores | 4 |
| RAM | 12GB |
| Storage | 200GB |
Recommended Specs
| Resource | Amount |
|---|---|
| CPU Cores | 8 |
| RAM | 24GB |
| Storage | 512GB |
Pre-Install Setup
There are a couple of things that you have to consider before beginning to download SO (Security Onion), what platform you are installing to, and how you will manage network interfaces.
For this guide, we will be using the UniFi/Ubiquiti software and loading SO onto Proxmox.
Ensure you have an ethernet cable running from the Proxmox server to an open port on the switch you will be mirroring from.
In Proxmox under the node settings go to
NetworkThen from here you will see a display of Network Devices. Anything not plugged in with an ethernet cable will read as not active. From here clickCreateat the top, thenLinux Bridge. Give this device a name then choose these settings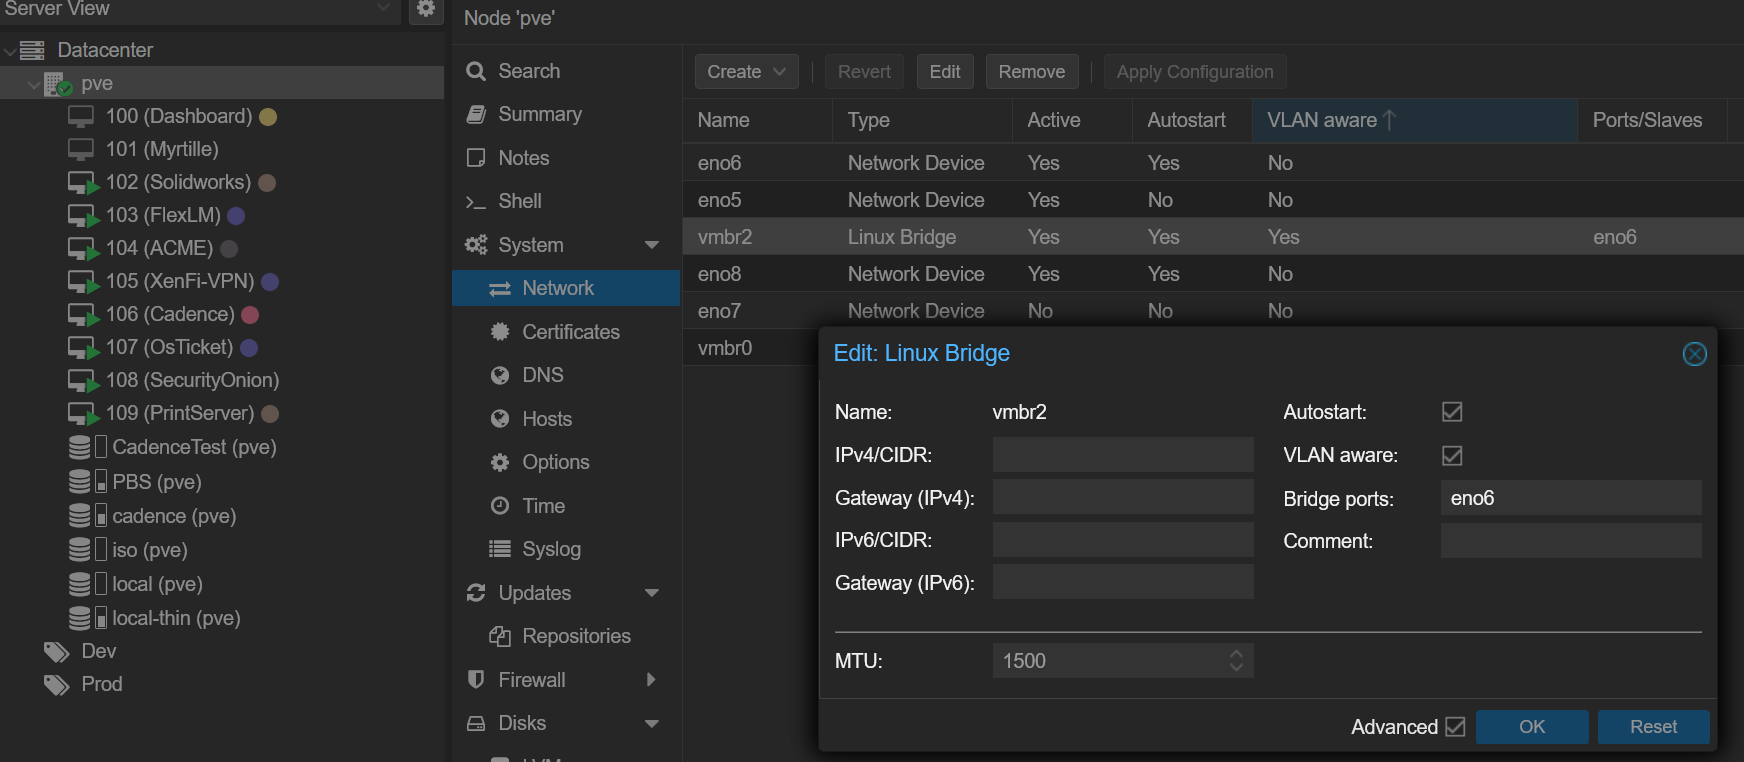
networkdevice In this case I chose the port
eno6. You can choose any unused port. This will be the same one you ran the ethernet cable into in step 1. This isvmbr2in this scenario. Create a secondLinux BridgeEnslaving a different port such aneno5in my case with the CIDR notation and gateway of your local network. Mine isvmbr0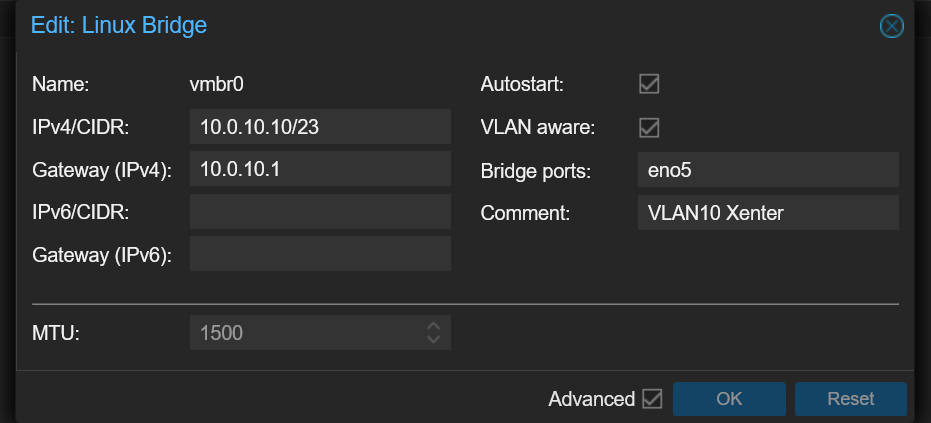
vmbr0 From here go to the UniFi software. Find the port that you plugged the ethernet cable into earlier in your switch. In my case, I connect my proxmox directly into my switch aggregator for this.
Select the port you connect Proxmox into, then select the VLAN you wish it to be on. Then change the advanced section into
Manual. Change the operation toMirroring, then theMirroring Portto whichever port you want to mirror. This effectively sets the source port for the mirror.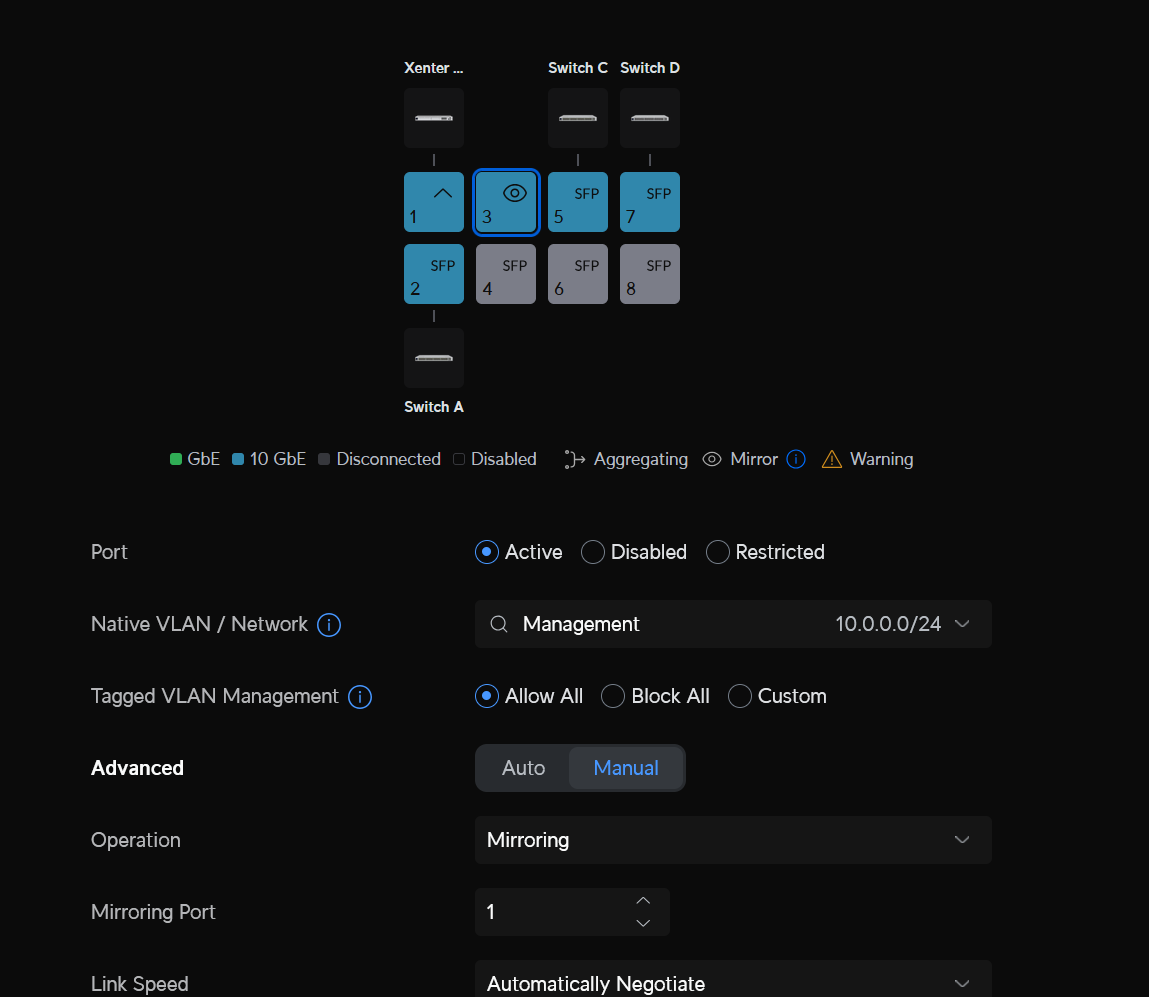
portmirror Head back to the VM’s settings then find
Firewall->Options. Verify that Firewall is set toNo, and thatMAC filterandIP filterare also set toNo. Having these set to Yes can cause important traffic to be blocked.Head to the SO website and download the newest version of SO available. (FYI. I have had problems in the past installing the newest, but a version a couple months older works better)
Security Onion Installation
Now that you have your ISO and network devices made and port mirrored, we can begin installing SO to Proxmox. Create a VM in Proxmox, and select the ISO. Continue with the defaults we use for creating VM’s in Proxmox. As well, select atleast the minimum requirements for SO.
For Network Devices select the device we made called
vmbr0. Leave model asVirtIOfor performance. Confirm settings then create the VM and DON’T launch it. Go into the hardware settings for the VM then at the top clickAddthenNetwork Device. We are now going to add our second network devicevmbr2. Now launch the VM and from here follow the prompt to format the virtual drive for SO and create your root login for the VM. Make sure you save this login informaton somewhere like Bitwarden.After the first installation, enter your root login credentials then you will be brought to a graphical configuration menu. From here, the options have changed depending on the version downloaded. This is what is used at the time of making this. Continue at first with the default options it gives you. Select
Standaloneoperation.Enter a Hostname for the device, then select your management NIC. Match the MAC Address listed to the one identifying
vmbr0Select DHCP for the management interface. After the installation, access the network management software like UniFi to find the IP then set it as a fixed IP/DHCP Reservation.
Select a
Standardoption to install the manager instead of Airgap. Then selectDirectconnection.For Monitor interface, choose the only left over NIC.
Enter an email address for an administrator account, then select a password.
Select to access the web interface over IP. You MUST select
Yeswhen asked if you want to allow other machines to access Security Onion via the web interface.From here you should be brought to an overview of your options that you have chosen. Confirm the options and then Security Onion will.
From here, SO will begin installing, It will take quite a while, so sit back and leave it until it is completely done.
Post Installation
Once SO has completetly installed and you are brought back to the terminal with a login. Enter your root credentials then run
sudo so-statusto verify that all processes are either running or atleast starting.Open the IP address that SO gave you to access the web interface SOC. Input the address into your web browser search bar and log in with the credentials you set durin the grahpical interface set up.
Go back to the terminal console and run
sudo soup. This is a SO updater. It will update the scripts and OS to newest version. It may require multiple runs to fully complete. It will tell you if it does.